Christmas Craft: Christmas Card Holders

This year I am in need of new ideas for how to display my Christmas cards.  The standard resting place on the mantel just isn’t cutting it anymore.  If you are in the same boat, then here are three really great ideas that I found.

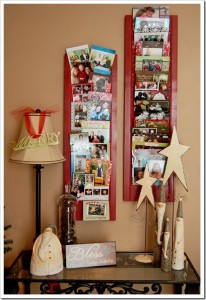
1) Christmas Card Shutters (pictured above) – This is fairly easy to make and shouldn’t take very long.

Supplies needed:

  • 2 wooden shutters (can be found at any home improvement store)
  • spray paint

To learn how to make it, check out Pearls, Handcuffs and Happy Hour.


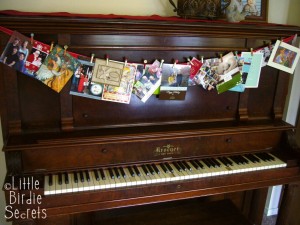
2) Christmas Card Garland – This is still fairly simple, but will require a bit more time and supplies.

Supplies needed:

  • Small wooden clothespins
  • Acrylic paint & foam brush
  • Various patterned papers (in Christmas colors, of course!)
  • Coordinating buttons
  • Decoupage medium & foam brush
  • Coordinating buttons
  • Hot glue gun
  • 3 to 5 yards ribbon (depending on where you hang your garland)

To see the tutorial on how to make this, check out Little Birdie Secrets blog post on Make and Takes.


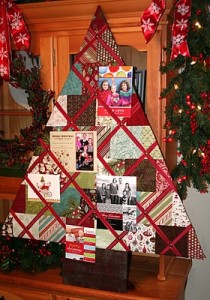
3) Christmas Tree Card Holder – This one requires sewing and quite a bit more of your time, but it is all so very worth it.

Supplies needed:

  • One Christmas Charm Pack ( I chose Fruitcake by Basic Grey)
  • 1/2 yard or one Fat Quarter solid fabric for tree trunk (I used Fruitcake – Grunge in Hot Cocoa)
  • One piece of 1/4″ plywood or hardwood that is at least 32″ x 48″ (Home  Depot & Lowes sell pre-cut plywood that is 4 ft x 4 ft. You can get  two trees out of it.)
  • Thin craft Batting
  • 7 yards 5/8″ coordinating ribbon
  • 20 Upholstery Tacks (sold at most home improvement and craft stores)
    Sawtooth picture hanger
  • Staple gun
  • Electric Saw

For a detailed tutorial with pictures on how to create this, check out Moda Bake Shop.

Thanks to all for such creative and wonderful ideas!


Christmas Crafts: Cinnamon Apple Ornaments

These ornaments smell so good and have so many uses!  They make great ornaments for the treee, can be given away as gifts or even as a little accent on a wrapped gift.  The latter is how I got mine and now they are hanging on my tree.  You won’t believe how easy it is to make these which is what makes it such a great craft to do with both older and younger kids.  No baking required!

Here is what you need:

  • Cinnamon
  • Apple Sauce
  • Craft Glue
  • Cookie Cutters
  • Ribbon
  • Toothpick

Here is how to make it -> All Free Craft’s Cinnamon Applesauce Ornaments Tutorial


Christmas Craft: Advent Calendars

Advent calendars are a great way to help your children keep track of how many more days until Chirstmas.  Ever since Thanksgiving my five year old has started each new day with the same question… “Is today Christmas?”  I cannot tell you how much I am looking forward to tomorrow so we can start our advent calendar.  I may even make one to put in her room that is just special for her.  I thought this Candy Christmas Tree Calendar that I found on about.com was really cute.

Here is what you need to make it:

  • Green Cardboard
  • Paint, Markers, or Crayons
  • 24 pieces of ribbon (each 10″ long)
  • Small Bell
  • 24 Individually Wrapped, Small Candies
  • Scissors
  • Paper to write the poem on

Here is how to make it -> Candy Tree Advent Calendar Tutorial

If you are looking for other advent calendar ideas, check this out -> Christmas Advent Calendar Ideas

Last Minute Thanksgiving Craft Ideas

If you are looking for ways to keep your kids entertained on Thanksgiving Day, then here are a few simple, easy to prepare craft ideas just for you.  Thanks to Say Yes to Hoboken for the ideas!

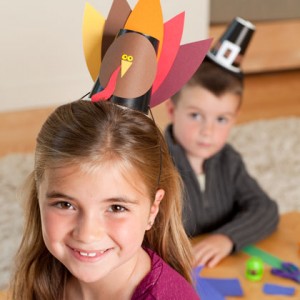
Here is what you need to create the paper cup hats pictured above:

  • Construction paper
  • Glue
  • Paper cups
  • Any other craft items you might want to glue on the cups (feathers, buttons, pipe cleaners, google eyes, etc.)
  • Elastic, ribbon or string

Here is how to make them:

  • Using a sharp pen or pencil, poke a small hole in either side of the paper cup, towards the top.
  • Push the ribbon, string or elastic through the hole in one side, straight through the cup, coming out the hole in the other side.
  • Cut feathers, eyes, noses, Turkey bodies, buckles, etc. out of the construction paper
  • Create an assembly line and let the kids have at it, gluing whatever they want on their hats!  Let them use their creativity to create whatever kind of hat they would like.
  • When your child is done creating his masterpiece, then place the hat on his head and tie the ribbon/string/elastic under his chin.

Here is what you need to make Corn Necklaces:

  • Dried corn kernels – presoak them to soften them up and then use a thick needle to poke holes in each kernel
  • embriodery floss and a needle or stiff waxed kitchen twine

Here is how to make them:

  • For older kids, have them use embroidery floss or other string with a needle to string their neclace.
  • For younger kids have them use waxed kitchen twine or thin string stiffened at the end with glue to string their necklace.

If you have older kids that aren’t really into the crafting scene, then Thankgiving games and quizzes might be the better route.  Check out About.com for some really great ideas.


Thanksgiving Craft: Thanksgiving Place Mats

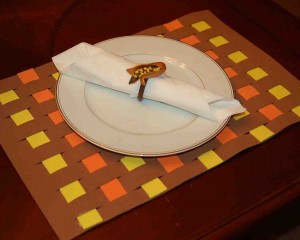
Last week, I featured the super cute pinecone turkeys that can double as placecards for your Thanksgivng dinner table.  I thought I would continue the theme this week with Thanksgiving placemats.  My kids are so excited that they are actually doing something to contribute to the big day.  I am just excited to have something to keep them busy on yet another rainy day.  Thanks to Crafts for All Seasons for the idea!

Here is what you need to make these Thanksgiving Placemats:

  • At least two sheets of 12 x 18 inch Foamie sheets.  As pictured above, you will need three sheets, one brown, yellow, and orange. You can use as many colors as you wish, though.
  • A ruler
  • A pen
  • A craft knife or Exacto blade
  • Scissors
  • Glue

Here is how to make it -> Thanksgivng Placemats Tutorial