Cooking with Kids Thursday: Pumpkin Seeds

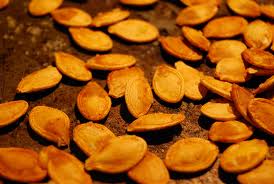
Growing up, I remember that part of carving pumpkins was always getting to eat the seeds afterwards.  I never really paid any attention to how my parents roasted the seeds, but I was always more than eager to be the taste tester.  Flash foward several years later and now I am the one carving pumpkins with my kids.  I have all the seeds, but haven’t a clue what to do with them.  So, I did a little searching and found two very yummy recipes for preparing pumpkin seeds.  Enjoy!

Here is what you will need to make Sweet and Salty Pumpkin Seeds:

-2 cups separated and dried pumpkin seeds (from your jack-o’-lantern)

-1/4 cup melted butter

-2 tbsp. sugar

-1/4 tsp. ground cinnamon

-1/2 tsp. cumin

-1/4 tsp. kosher salt

Here is how to make them -> Sweet and Salty Pumpkin Seeds Tutorial

Here is what you need to make Chocolate Pumpkin Seed Clusters (my favorite!):

-8 oz. dark chocolate, chopped

-2 cups hulled and roasted pumpkin seeds

-wax paper

-2 cookie sheets

Here is how to make them -> Chocolate Pumpkin Seed Clusters Tutorial


Tasty Treat Tuesday: Mini Caramel Apples

Caramel apples are one of my favorite Halloween treats, but they are not even close to being kid friendly which means I basically never get to eat them anymore.  I just cannot stand the sticky caramel mess that seems to cover my children from head to toe even after just one bite of them.  How does one even do that?  I think my kids have a talent for messes.

I am so excited about this recipe for mini caramel apples!  There is way less mess involved and because they are bite sized you can eat several and not feel as guilty as you do after you have eaten a full sized caramel apple.

Here is what you need to make these mini caramel apples:

  • 4-inch lollipop sticks (or toothpicks)
  • Melon baller
  • Granny Smith apples or whatever you might have on hand (one apple makes about 8 mini
    apples)
  • Butterscotch or peanut butter chips
  • Chopped nuts, nonpareils, sprinkles, shredded
    coconut (optional)
  • Small paper candy cups

Here is link to the tutorial for mini caramel apples -> Mini Caramel Apples Tutorial


Slow Cooker Monday: Chicken Lickin’ Good Porkchops

My mornings are crazy, so I’m all about a recipe that cooks itself that requires 5 minutes or less of prep time.  This recipe for Chicken Lickin’ Good Porkchops is THAT recipe!  It’s yummy, too!  We usually serve it with corn and mashed potatoes as side items.

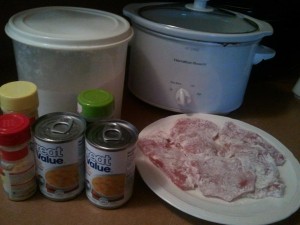
Ingredients:
6-8 lean pork chops, 1-inch thick
1/2 cup flour (omit if you don’t brown chops in skillet)
1 tsp salt
1 1/2 tsp dry mustard
1/2 tsp garlic powder
2 Tbsp oil (omit if you don’t brown chops in skillet)
1 10.5oz can chicken & rice soup

Dredge pork chops in mixture of flour, salt, dry mustard & garlic powder. Brown chops in oil in a large skillet. Place browned pork chops in crockpot. Add can of soup. Cover and cook on low 6-8 hours or high 3 1/2 hours. If I don’t brown the chops, then I just toss the salt, dry mustard & garlic powder in the crockpot instead of dredging the chops.

*Note: When making this meal, I use a can of family size chicken & rice soup and drain off some of the broth – it keeps the meat tender and there is more of the chicken & rice mixture for everyone! If you don’t have time to brown the chops first in a skillet, I’ve also just dipped it into the flour mixture and put it straight into the slow cooker and it works fine that way, too.

*This post may contain affiliate links. Please refer to my disclosure policy for more information


Cooking with Kids Thursday: Halloween Slime

I know that this is not really something you and your kids can eat, but I can guarantee they will still have tons of fun making it and playing with it.  I don’t really like messes and gooey things, but if it keeps my kids busy and entertained for a while then I am sold!

Here is what you need to make Halloween Slime:

-2 cups Elmer’s glue

-1 1/2 cups warm water

-food coloring of your choice

-2 tsp. Borax

-1 1/3 cups warm water

Here is the tutorial on how to make Halloween Slime -> Pinching Your Pennies Halloween Slime Tutorial

Tasty Treat Tuesday: Homemade Oreo Cookie Spiders

I am so excited that Halloween is almost here!  I love finding and making all the fun and yummy treats out there for the holiday.  This recipe is actually a spin on the traditional oreo cookies we make the rest of the year.  The best part about these cookies is that you can color the  frosting/filling to match any holiday.  We do red and green for Christmas, pink and yellow for easter, red and blue for Independence day… The possiblities really are endless.

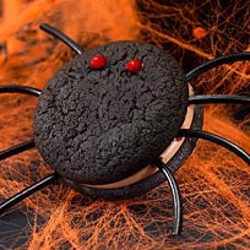
Here is what you will need to make these Homemade Oreo Cookie Spiders:

1 Devil’s food cake mix

1/2 cup Shortening

2 Eggs

Black string licorice

Red decorating gel or small red candies

Here is what you need to make the frosting:

8 oz Cream Cheese

2 sticks of Butter

2 Tsp. Vanilla

2 to 4 cups Powdered Sugar (Icing Sugar)

Food coloring

Here is how you make the cookies:

Cookies:

Mix all cookie ingredients together (cake mix, shortening, eggs).   If dough is too sticky, refrigerate for a while.   Roll the dough into dime-sized balls and place on a cookie sheet.   Bake at 350 degrees for 8 minutes.   Cool cookies.

Frosting:

Mix all frosting ingredients until smooth (cream cheese, butter, vanilla, powdered sugar).   If it is too thick, thin with vanilla.   Once you have the desired consistency, mix in food coloring until you have reached your desired color.  Frost the backs of cookies and place them together to make sandwich cookies.  Then cut licorice into 1 inch pieces and place them into the frosting on the sides of the cookies to create spider legs.  Then, use decorating gel or red candies to create eyes on one side of the cookie.